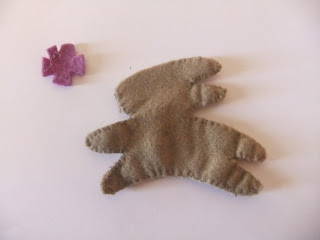
This is the template I have used to make the little bunny shape. You need 2 of the bunny shapes to make one stuffed bunny. I have not left seam allowance so if you want a bigger pattern allow for seams.
Cut two shapes out of felt and pin together to stop movement. You can use contrasting or matching thread for this
Blanket stitch the two pieces of felt you have cut out together. I have found starting from just in front o f the ear and work around the ears up to just above the nose leaves a nice gap for stuffing.
Cut one little circle for the flower on the bunny. Clip the edges to create the flower shape.
Very lightly stuff the bunny starting with the legs at the bottom and gently work your way up. By the way in my later versions I have left a long tail when finishing the blanket stitch in part 1 to allow this to finish the bunny of later. I am a slow learner sometimes.
When finished stitching the bunny up, tie some ribbon around his neck and just sew the flower on with a little stitch to secure.
I hope you enjoy this little bunny. He really is a favourite of mine and the children just adore them. Great for putting in little pockets and carrying around.
Blessings to you and your homes,


0 comments:
Post a Comment